Command Line Usage
When using Syncrify client on platforms other than Windows, it may be convenient to use the command line interface to run your backup instead of using the GUI interface. If you are connecting to a Linux/UNIX machine remotely using SSH, you may not have a choice of using the GUI client. In such cases, you don't have a choice but to use the command line interface.
Prerequisites
- Java run-time must be installed on the machine. If you downloaded the Syncrify Client with installer, check $INTSTALL_DIR/jre/bin/java to ensure a file exists. Otherwise, download java from http://java.com
- Either java must be on your machine path or use the absolute path to run java
Command line usage
OR
Options
Most options are in a name-value format, except for the stand-alone parameters. The parameter name starts with a minus (-) sign followed by its name, a space and then its value. For example:
-pr ProfileOne
| Option | Description |
|---|---|
| -console | This option makes Syncrify client run in console mode. If this is missing every other option will be ignore and Syncrify client will run in its default GUI mode |
| -u |
User's email address that is used to identity the account on the server. |
| -p |
User's password |
| -pr |
Profile name corresponding to the Profile name on the server. Use the same value for profile name when running the same backup again. Specifying a different value will cause the server to store files in a different folder. This can be a one-word value without spaces and should contains
characters that are considered valid for a directory name. |
| -sp |
Server path. This corresponds to a one-word folder name on the server that is used for storing files under the profile. Use the same value for this parameter when running the same backup again. This can be a one-word value without spaces and should contains characters that are considered valid for a directory name. |
| -enableVersioning |
This is a stand-alone parameter. Enables versioning. |
| -twoway |
This is a stand-alone parameter. Enables Two-way sync. |
| -saveProfile |
This is a stand-alone parameter. This is a convinient way of creating a profile file without running the
actual backup. The profile file will be created in ~/.syncrify folder. Refer to example number 2 below to see how to use this profile to run
backup. |
| -nocompression |
This is a stand-alone parameter. When present Syncrify client won't use compression before transferring files. |
| -v |
This is a stand-alone parameter. When present log messages will appear on the console. |
Example 1
Use the following example to run a backup based on a pre-created profile file. This is the preferred method of running backup.
The above example assume you have pre-created a profile called myProfile using the GUI interface and now want to run it through command line.
Example 2In the above example, files located in \user\home\jack\Desktop will be backed up to a server running on backup.company.com using the HTTPS protocol on default port. No compression will be used.
IMPORTANT NOTE:This method is deprecated and does not provide every backup option and therefore, we recommend you use the first example.
An important information to keep in mind is the use of -console parameter. When this parameter is missing, Syncrify will display a GUI window showing a status bar. -console parameter is very useful when you do not have the GUI interface available, which is typically the case on Linux and Unix machines.
Creating A Profile From Console
See Admin, Users, & Profiles for a detailed explanation of a Profile in Syncrify.
You can create a new profile using the following command from console:
This will prompt you for the following questions.
| Profile name: | Name of the profile. We recommend you use a one-word name without spaces. Assume you use MyBackup for this value, you can issue the following command to run a backupjava -jar SyncrifyClient.jar MyBackup.syncrify
|
|---|---|
| Server URL: | Refers to the URL where your server is running. For example: http://backup.YourCompany.com:5800 ORhttps://backup.YourCompany.com
|
| Login email: | Email address used for user's login |
| Password: | User's password |
| Path: | Refers to the path that you want to backup. For example: /users/home/john/Documents
|
| Filter | Specify a filter string. Refer to this document for more information |
| Additional path: | Specify additional folders/files to backup. You can specify as many paths as you like. Hit ENTER without typing any path when done. |
| Excluded path: | Enter path that you want to exclude from the list |
| Compress data: | Type Y for yes and N for no. When set to Y, client will compress data before sending it to the server |
| Delete files: | Type Y for yes and N for no. When set to Y, server will delete files if they are deleted from the client. |
| Backup locked files | Type Y for yes and N for no. When set to Y, VSS services are used on Windows. This parameter is only meaningful on Windows. It has no affect on other operating systems. |
| Enable versioning | Versioning is enabled if set to Y |
| Send email: | An email is sent with a backup log |
| Email recipient | Address that gets the email. If blank, login email is used for the recipient's address |
| Encryption key | Password used for encryption |
Running backups from command line
Before you can run backups from command line, you have to create a Profile using the GUI. Every profile you create is stored in user's home directory with a file extension of .syncrify
On Windows you can run a backup by specifying the Profile file name as a command line argument to SyncrifyClient.exe file. For example:
C:\Program Files\SyncrifyClient\SyncrifyClient.exe MyProfile.syncrifyIn the above example, MyProfile is the profile name of the profile you want to backup.
On Linux and other platforms, you should be able to execute a backup by using the following command line:
SyncrifyClient.sh MyProfile.syncrifyScheduling a backup on MS Windows
On Windows, the scheduler for Syncrify is integrated with the operating system. Every Windows machine comes with a scheduler that is used to schedule backup tasks on the client machine.
Following steps demonstrate how to schedule a backup.
- Click Add button to add a new schedule
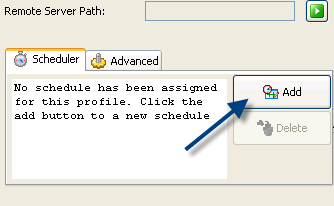
- This opens up the Scheduler window.
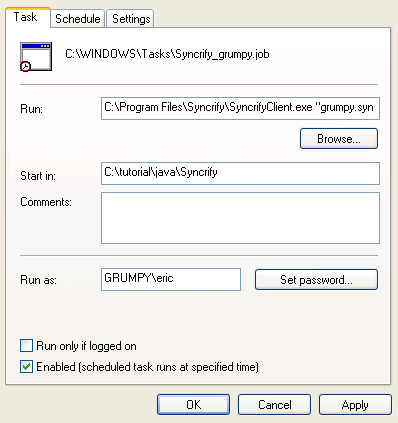
- Click the Schedule tab to specify a schedule
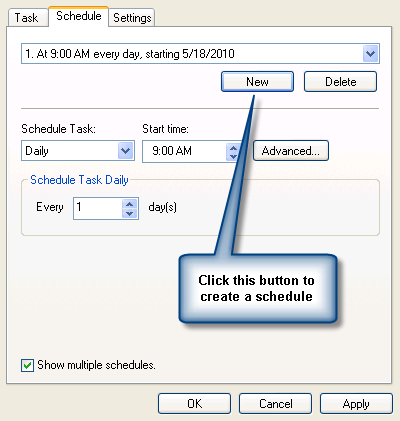
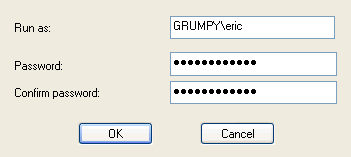
- Finally, click Ok. Windows will prompt you for a user id and password. Specify a valid user id and password on your system. Backup task will be run using this login. We recommend using the same ID that owns the files that are being backed up.
- Finally, Click Ok
Scheduling a backup on Mac OS X
Scheduling a backup task on Mac is similar to Windows but it uses the built-in scheduler that comes with OS X.
The following steps demonstrate how to schedule a backup on Mac.
- Click the Add button at create a new schedule.

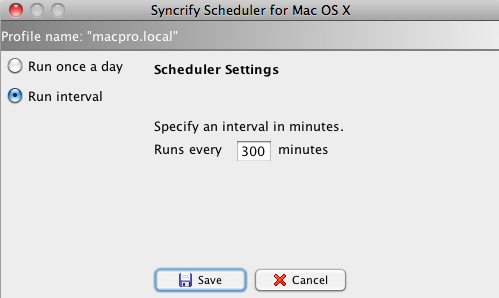
- This opens up the scheduler windows, which looks like the image below
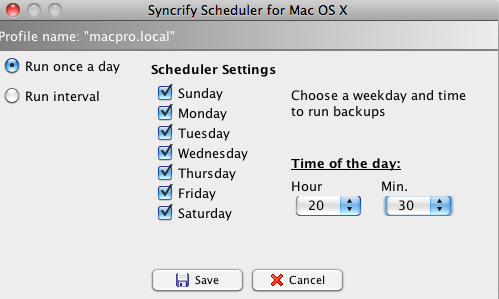
- This window allow users to select the weekday and a time of the day to run the backup task. Notice that hour are represented in 24 hour time format - meaning if you want to schedule a task at 8:30 PM, you will have to select 20 for hour and 30 for minutes.
- You should also specify a time interval to run backup. This allows you to run the backup task after every X number of minutes. For example, to run a backup every 5 hours, specify 300 minutes. See below.